 By Sofia Bennett, Home & Decor Editor
Reviewed & updated September 2026
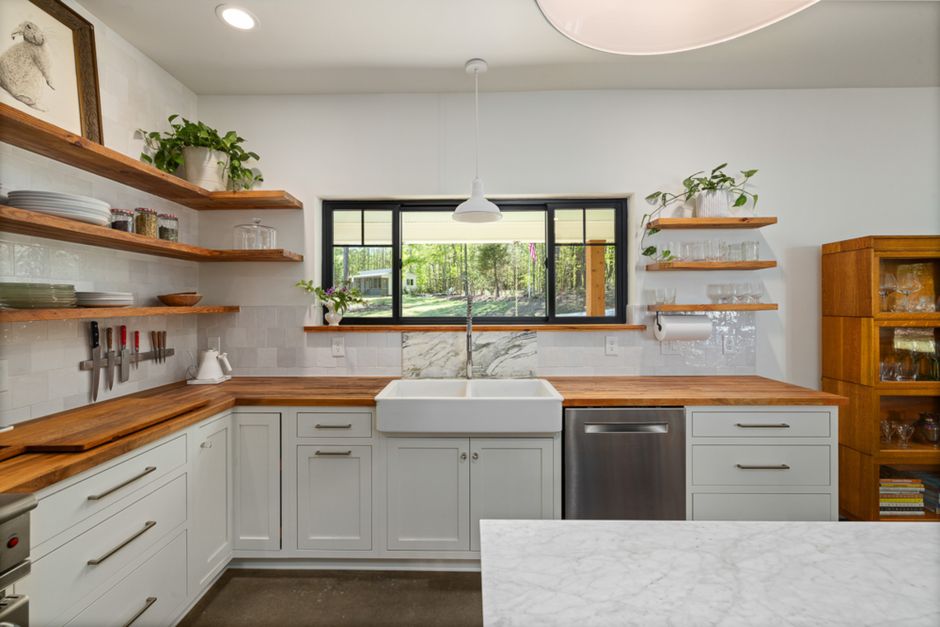
Open shelving can make a kitchen feel airy, collected, and personal — or it can turn into a dusty, cluttered eyesore within a month. The difference isn't the shelves themselves, it's how you edit and arrange what goes on them. Here's how to get the styled-magazine look without living out of a display case.
 What you’ll find insideCurated by Sofia · 6 min read
- Start with fewer items than feels right
- Group in odd numbers
- Vary height, not just color
- Use what you already own — with restraint
- Add one organic element per shelf
- Lean, don’t just stack
- Think about what’s actually practical to display
- A simple shelf-by-shelf formula
- Common mistakes
- The takeaway
- Further reading & trusted sources
Start with fewer items than feels right
The single biggest mistake with open shelving is treating it like storage instead of display. If a shelf is packed edge to edge, it reads as clutter no matter how nice the individual pieces are. A good rule of thumb: fill each shelf to roughly 60-70% capacity, leaving visible breathing room around objects. Pull everything off the shelf first, then add back only what you'd be happy to look at every day — the rest goes in closed cabinets.
Group in odd numbers
Designers lean on odd-numbered groupings (3, 5, 7) because they read as more visually interesting than even pairs, which can look too matched and static. A cluster of three items — say, a stack of bowls, a single plant, and a small cutting board leaned upright — creates a natural visual triangle that's more pleasing than two items lined up evenly.
Vary height, not just color
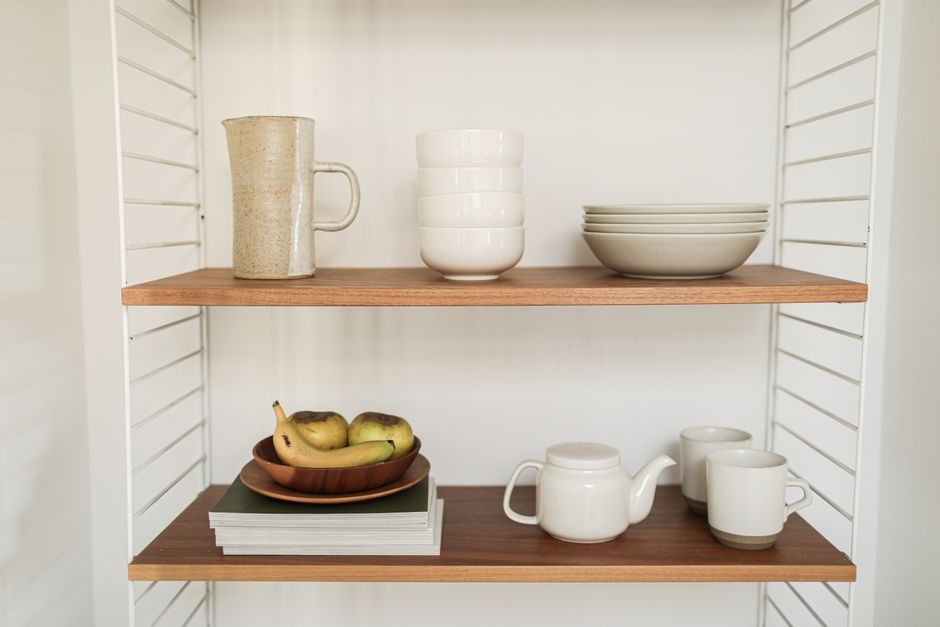
A shelf full of items at the same height looks flat even if the colors are coordinated. Mix a tall item (a vase, a stack of cookbooks, a pitcher) with a short one (a small bowl, a candle) and something in between. Layering height is what actually creates the "styled" look — color coordination alone isn't enough.
Use what you already own — with restraint
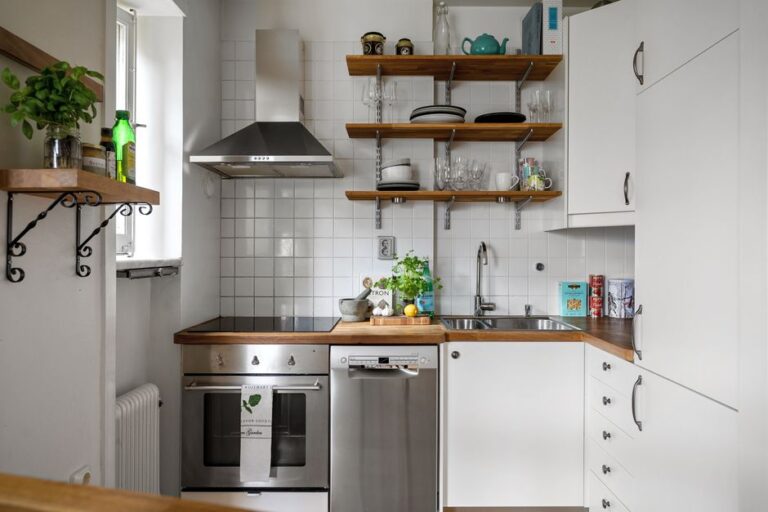
You don't need to buy new dishware to style open shelving well. Pull your best-looking everyday pieces: a stack of white or neutral plates, one or two ceramic bowls, a wooden cutting board, a single glass jar of pasta or grains. The trick is restraint, not acquisition — five well-chosen pieces beat fifteen mismatched ones every time.
If your dishware is a mix of patterns and colors, keep the open shelves to a simplified, mostly neutral palette (white, cream, wood, black) and store the more colorful or mismatched pieces in closed cabinets nearby. This keeps the open shelving feeling curated instead of chaotic.
Add one organic element per shelf
A small plant, a bundle of dried flowers, or a bowl of citrus brings life to what would otherwise be a static display of dishware. Low-maintenance options work best near a kitchen given heat and grease exposure — pothos, a small snake plant, or a faux option if you know the shelf gets steamy from cooking.
Lean, don't just stack
Instead of stacking everything flat, lean a cutting board, a framed print, or a large plate against the wall at a slight angle behind other objects. This creates visual depth and gives the shelf a layered, collected-over-time look rather than a showroom-flat arrangement.
Think about what's actually practical to display
Open shelving works best for items that are either decorative or get used often enough that dust isn't a real problem — everyday plates, mugs you use daily, cookbooks, oils and vinegars you cook with weekly. Items that sit untouched for months (special-occasion china, rarely-used gadgets) collect grease and dust fast in an open kitchen and are better stored behind a door.
A simple shelf-by-shelf formula
If you're staring at empty shelves and don't know where to start, this formula works for almost any kitchen:
- Top shelf: taller, less-used items — a stack of cookbooks, a large pitcher, or a decorative object, since it's viewed from below and doesn't need daily access.
- Middle shelf: your everyday dishware — a stack of plates, bowls nested together, mugs hung on small hooks underneath the shelf edge.
- Bottom shelf: the most-used items and one organic touch — everyday glasses, a cutting board leaned against the wall, and a small plant or bowl of fruit.
Common mistakes
- Overfilling every inch — leaving negative space is what makes a shelf look styled instead of stuffed.
- Displaying mismatched dishware without an editing pass — a shelf of five different plate patterns reads as clutter, not personality.
- Forgetting maintenance — open shelves near a stove collect grease film faster than closed cabinets; plan on wiping items down every couple of weeks.
- Symmetrical, identical arrangements on every shelf — it looks rigid rather than lived-in; vary the composition shelf to shelf.
- Ignoring the wall behind the shelf — a plain wall color or subtle wallpaper behind open shelving makes the objects on it pop instead of blending into a bare wall.
The takeaway
Open shelving looks intentional when it's edited, not filled — fewer items, varied heights, odd-numbered groupings, and one organic touch per shelf will get you most of the way to that collected, magazine-style look. Treat it as a rotating display rather than permanent storage, and swap pieces in and out seasonally to keep it feeling fresh.
Frequently asked questions
Do open shelves get greasy in a kitchen?
Yes, especially shelves near the stove — expect a light film over a few weeks of regular cooking. Wipe items down every couple of weeks and consider keeping shelving away from the direct cooking zone if possible.
How many items should go on one shelf?
There's no fixed number, but aim to fill roughly 60-70% of the visible space rather than edge-to-edge — a shelf with 4-6 well-chosen items usually looks more intentional than one with a dozen.
What should I NOT put on open shelving?
Rarely-used specialty items, anything you'd be embarrassed to have on display, and mismatched plastic containers are best kept in closed cabinets — save open shelves for your best-looking everyday pieces.
Is open shelving impractical for a small kitchen?
Not necessarily — in small kitchens, open shelving can actually make the room feel larger by removing bulky upper cabinet doors, as long as it's kept edited rather than crammed with everything that would've gone behind a door.
Read next
Further reading & trusted sources
The detail most people miss
Shelves positioned near or directly above a stove pick up a noticeable grease film within a few weeks of regular cooking, which is the detail that separates a shelf that stays photo-ready from one that needs constant wiping down — placement matters as much as styling. Leaning a cutting board or plate against the wall behind other objects, rather than stacking everything flat, is the specific trick that reads as ‘collected over time’ instead of ‘staged,’ since flat stacking is what makes a shelf look showroom-arranged.
Sofia is happiest hunting down the high-end look for a fraction of the price; she’s convinced a beautiful room comes from restraint and clever styling far more than from budget. She shapes Dreamy Dwell’s room-by-room guides around ideas you can actually copy in a rental or on a tight budget — no staged ‘this is my mansion’ fantasy. AI tools help with the research and first drafts, and a human edits every piece before it goes live. We never fake reviews or pass off a styled photo as a real before-and-after.