A gallery wall turns a blank, boring wall into the most personal feature in your home — and done well, it looks like it cost a fortune even when it didn't. The secret isn't expensive art; it's good planning, consistent framing, and smart spacing. Here's exactly how to arrange one like a designer.
Step 1: Choose your wall and theme
Pick a wall that's begging for attention — above a sofa, along a staircase, behind a bed, or down a hallway. Then decide on a loose theme so the collection feels cohesive: black-and-white photography, botanical prints, abstract art, or a personal mix of photos and meaningful pieces.
Step 2: Decide on a frame style
Cohesion comes from your frames more than your art. Choose one of two approaches:
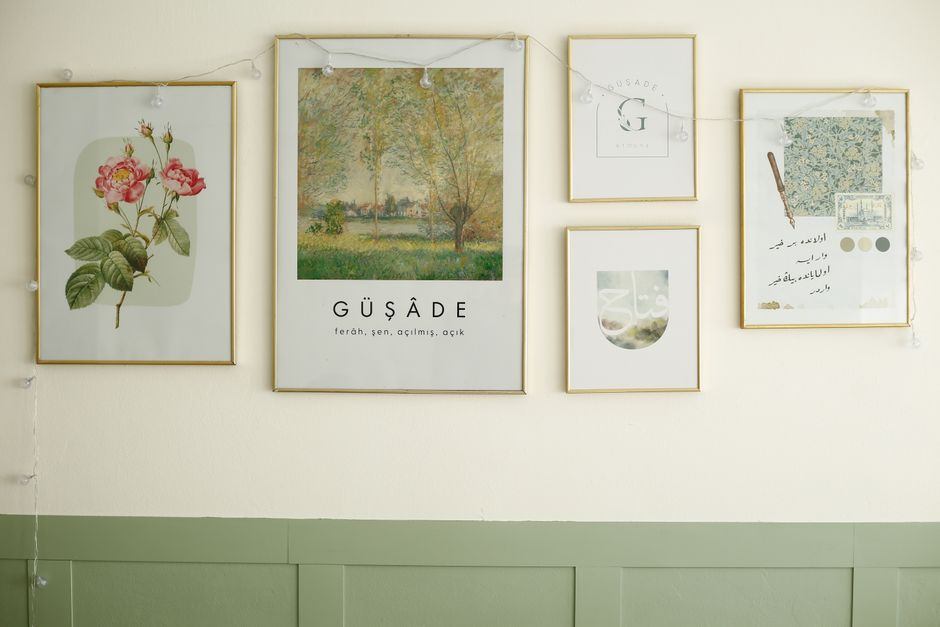
- Matchy and modern: all the same frame color and style (all black, all natural wood, or all gold) for a clean, gallery-like look.
- Collected and eclectic: a mix of frames unified by sticking to two finishes — say, black and wood — so variety still feels intentional.
Adding generous white mats inside the frames instantly makes inexpensive prints look elevated.
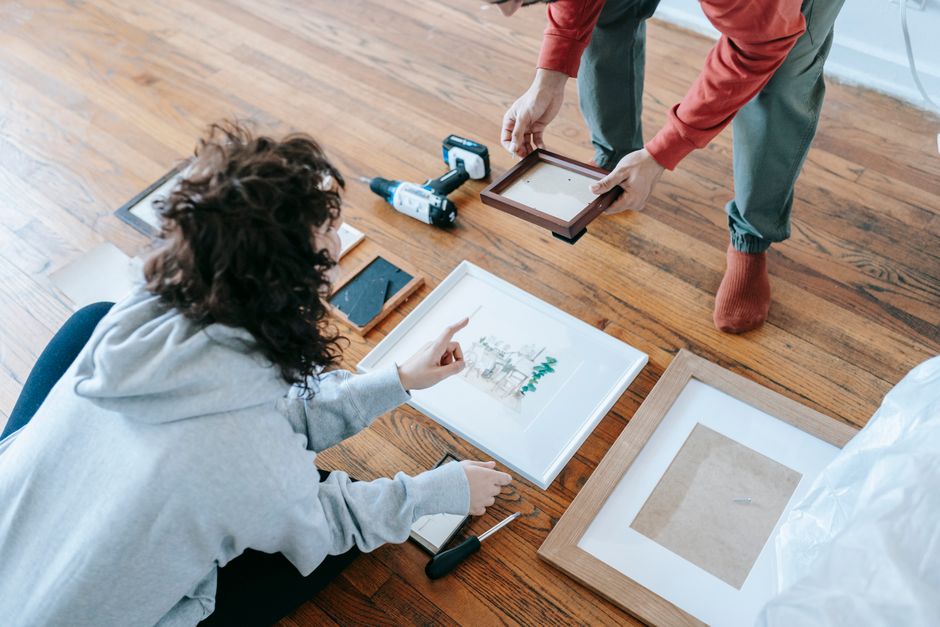
Step 3: Gather and plan on the floor
Lay all your framed pieces out on the floor first and play with the arrangement before a single nail goes in. Two layouts to consider:
- Grid: equal-size frames in neat rows and columns — crisp, symmetrical, calming.
- Salon style: mixed sizes arranged organically around a central anchor piece — lively and collected.
Step 4: Anchor and space consistently
Start with your largest piece slightly off-center as the anchor, then build outward, balancing larger and smaller frames so no area feels heavy. The pro trick for spacing: keep a consistent gap between frames — about 2 to 3 inches works for most walls. Even spacing is what separates a designer look from a haphazard one.
Step 5: Get the height right
Center the whole arrangement around eye level — roughly 57 to 60 inches from the floor to the center of the grouping. Above furniture, the bottom row should hover about 6 to 10 inches above the sofa or console so the art relates to the piece below it.
Step 6: Trace, tape, and hang
Trace each frame onto kraft paper or newspaper, cut out the shapes, and tape them to the wall to preview the layout at full scale. Adjust until it feels right, then hammer your nails right through the paper and tear it away. This guarantees the spacing you planned and saves you a wall full of extra holes.
Easy ways to fill a gallery wall affordably
- Free printable art (download, print, and frame) is the cheapest route to a polished look.
- Inexpensive frames with white mats look far pricier than they are.
- Mix in objects — a small mirror, a woven piece, or a hanging plant — for texture.
- Personal photos in matching frames make it meaningful and unique.
The takeaway
A great gallery wall comes down to a loose theme, cohesive framing, consistent 2–3 inch spacing, and the right height. Plan it on the floor, preview it with paper templates, and anchor around eye level. Get those basics right and even budget prints will look like a curated collection.
Frequently asked questions
How do I space a gallery wall?
Keep a consistent gap between every frame — about 2 to 3 inches works well for most walls. Even spacing is the single biggest factor in making a gallery wall look professionally arranged.
How high should I hang a gallery wall?
Center the arrangement around eye level, roughly 57 to 60 inches from the floor to the middle of the grouping. Above a sofa or console, keep the bottom frames about 6 to 10 inches above the furniture.
Should gallery wall frames match?
They don't have to, but cohesion is key. Either use all matching frames for a clean look, or mix frames while limiting yourself to two finishes (like black and wood) so the variety still feels intentional.
How do I plan a gallery wall before hanging it?
Lay the frames out on the floor first, then trace each onto kraft paper, cut out the shapes, and tape them to the wall to preview the layout at full size. Adjust the paper templates, then hang right through them.